Difference between revisions of "Garmin Nuvi 350 POI Management"
(No difference)
|
Latest revision as of 22:47, 11 March 2012
Using the Nuvi 350 with the Tracker 2 is a terrific combination of APRS and a navigation system. One issue with the Nuvi 350 is that all APRS packets received are stored in the Nuvi’s “Favorites” memory and displayed on the screen. While this is generally what an APRS enthusiast wants to have happen these station waypoints can get ‘stale.’ The Nuvi keeps and displays the last waypoint heard whether the mobile APRS user is still in the area or not. While the “favorites” list can easily be cleared by using the “Delete All” on this also deletes any favorites you may have stored and want to keep for use in navigation with those functions of the Nuvi 350.The workaround is to save your personal “Favorites” on an SD card that the Nuvi can use. Garmin refers to this list as Points of Interest or POI.
One procedure used to create a POI file on an SD card is as follows:
Using EasyGPS ( a free program available here: [1] ) upload from the Nuvi the Favorites stored there using a USB to Garmin cable to you computer. EasyGPS files are stored on your computer’s hard drive in a folder you create. These POIs can be manipulated, deleted, copied or changed in EasyGPS.
Next download Garmin's free POILoader computer program here: [2] Running that program you need to have your Nuvi 350 connected to your computer via the USB cable and an SD card installed in the Nuvi. The POILoader program brings up a dialog box asking to “Find Device” with a drop down menu asking if you want to put the POI data on the Nuvi or on the SD Card. Choose to upload the SD card and Browse your way to the file where you stored your file containing your EasyGPS POIs (see note below). The POILoader program then creates a file on the SD card that the Nuvi recognizes.
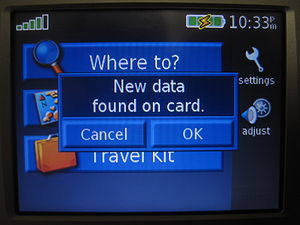
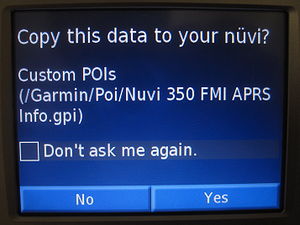
Safely disconnect the Nuvi from your computer and turn the Nuvi’s power on. With the POIUploader’s newly created folder on the card your Nuvi will bring up a box saying “New data found on card.” Push “OK.” The Nuvi then asks to “Copy this data to your Nuvi?” Push ‘Yes”. The Nuvi will then start as usual.
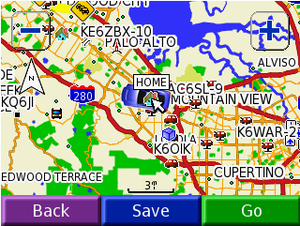
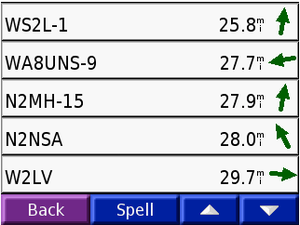
To use the POIs stored on the SD car push “Dispatch” > “Find Location” > “My Locations” (with the heart icon). From here is the screen where you can “Delete All” (lower right corner) and also a new button appears called “Custom POIs”. Pushing the “Custom POIs” button will show the POIs you’ve written to the SD card. Select whichever one you’d like then click “Go!” or “Save” which moves the point to the Nuvi’s “My Favorites” memory where it can be used as expected for navigation. This is a change from how Favorites were stored before. You now have to select from the list of POIs your favorites which will then be loaded to the Nuvi’s internal memory for use in navigation where they will remain until you "Delete All" again - which can be daily or simply when you have too many 'stale' points on your Nuvi's Nav screen for your taste.
There is debate on whether you need to remove or write protect the SD card when clearing the memory of stale points as all points are deleted. It seems it doesn’t matter as the memory can be cleared with an unprotected SD card in the slot when pushing “Delete All” and the POIs are still on the SD card for use.
Note: If you want / need to add more of your own personal POIs you'll have to get them to your computer's hard drive in the EasyGPS file and then use POILoader to again add to the SD card. It seems the Nuvi will only recognize one file for POIs from the SD card so save all of your personal POIs in one file in one folder on your computer’s hard drive (PoiUploader is a little fickle here). Repeat: Use one file in one folder on your computer’s hard drive for your personal list or you’ll see no POIs on the POI list despite them having been loaded to the SD card.


